Horseshoe Bend Photo Tips
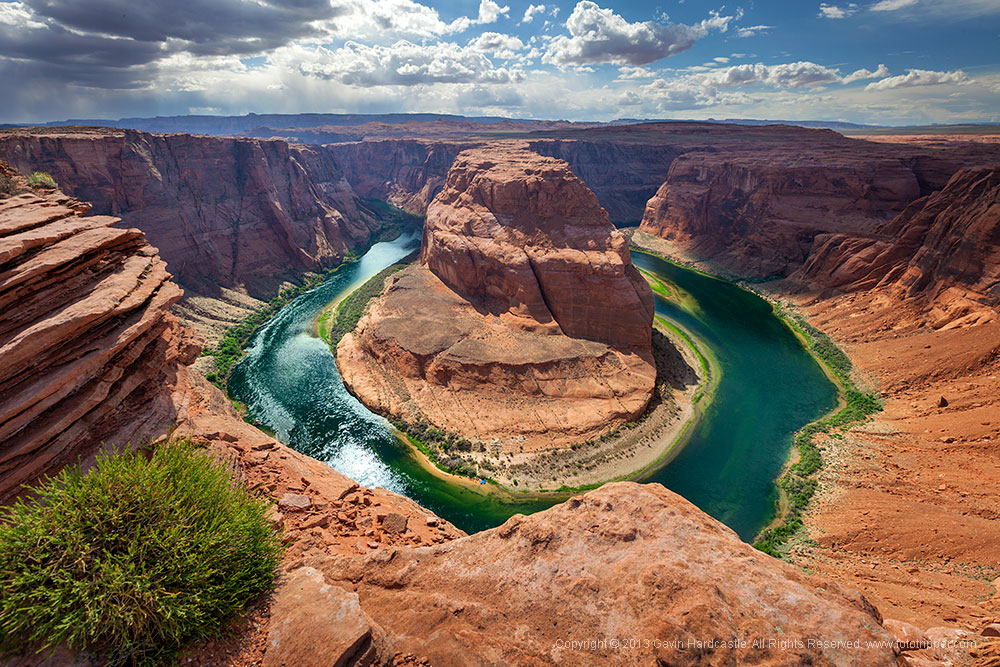
I defy you not feel a total sense of AWE when you clap eyes on Horseshoe Bend for the first time. It really is a site to behold. I actually find it more impressive than the grand canyon because of it’s sheer simplicity and epic beauty.
Add to that the fact that it’s just a short 10 minute drive from Page and you’ve got a total winner of a location for photography and of course a nice picnic. Here are my Horseshoe Bend Photo Tips.
Please subscribe to the Fototripper mailing list or hit this ‘Follow’ button below to get Facebook updates. We’d also love it if you tweeted this page.
 Top Tips
- Wide Angle Lens – You’ll manage to fit all of Horseshoe bend into even a 24mm lens if your camera has a full frame sensor. For smaller sensors you’ll need to stand further back or use a wider lens like a 16mm. You could use a fish eye lens if you like the distorted perspective effect. I used a Zeiss 21mm on a 5Dmk II and I was able to fit plenty into the frame.
- High Dynamic Range – There’s a lot of contrast at Horseshoe bend so you’ll need to bracket and shoot many different exposures to capture the huge dynamic range. You can use HDR software or manual exposure blending in Photoshop to fix blown out skies and dark black shadow areas.
- Tripod Challenges – Use a sturdy tripod that has a bit of weight to it. It can get windy on that edge.
- Use a Polarizer – Depending on the time of day and the weather you might get a lot of glare reflecting off the water so use a polarizer to tame it and pop those colours. My heliopan polarizer really made the greens in the water jump out.
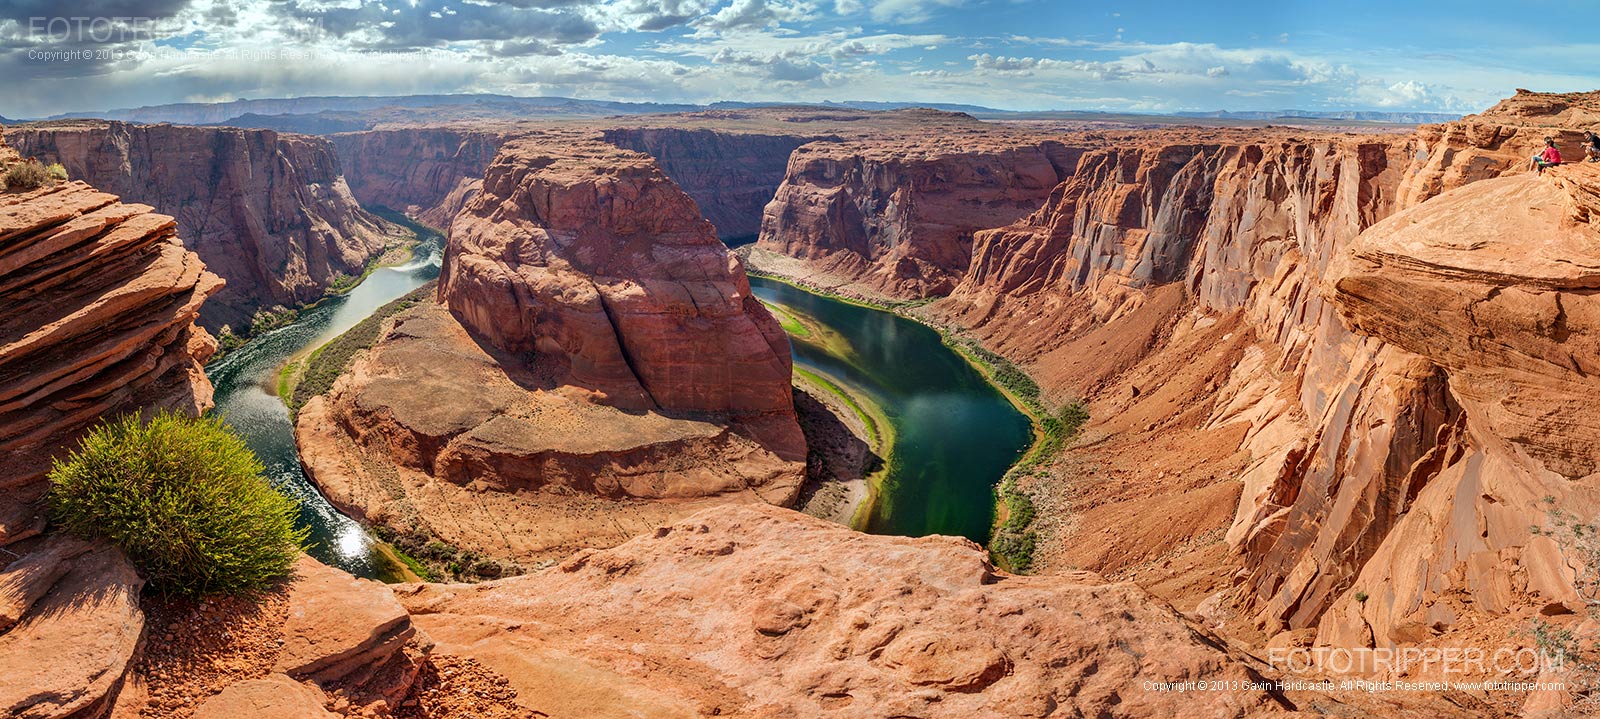
- Take a Pano – My panoramic shot above was taken using 6 shots in the portrait position. If you are using a wide angle lens to take your stitch shots you’ll probably find that Photoshop will struggle so use my current favourite panoramic stitching app PTgui.
- Use the Finger Filter – You’ll be doing lots of bracketing so use your hands and fingers to block out the brighter parts of your image so that you don’t get crazy lens flare.
Get Some People in Your shot
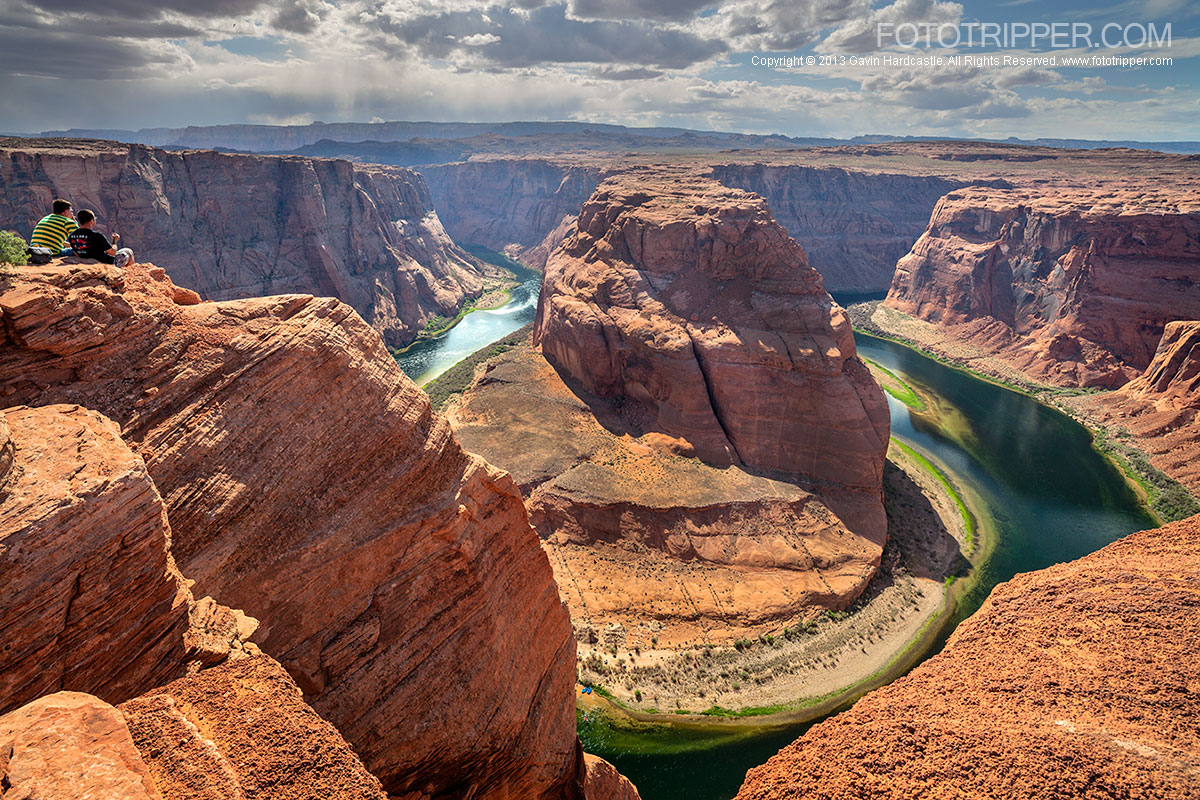
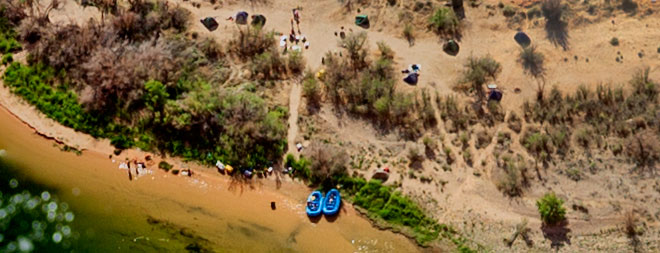
As a landscape photography I usually try to avoid getting people in my shot but sometimes it’s great to include people for a sense of scale, Horseshoe Bend is one of those places. Can you see that tiny blue dot in the water in the lower middle area of my shot above? It’s a rubber dingy, shown below at a 100% crop. That should give you some idea of how big Horseshoe Bend really is.
Any time of day is good.
Horseshoe Bend is one of those places that looks good at all times of day depending on the weather. My intention was to shoot the bend either before sunrise or after sunset but when I got there mid afternoon I was so blown away by the rich greens in the water that I knew I had my shot. Those rich, luminous greens simply would not be there during dusk light and the incoming storm clouds added a touch of drama.
My advice would be to go there at whatever time you arrive, if the weather is right you’ll get a great shot. If not, come back again until the weather gives you something interesting. Don’t assume that magic hour will give you the best light as much of the bend will be in shadow.
Recommended Equipment
- Wide Angle Lens
- Polarizer to punch colours and tame reflections.
- Sturdy tripod for windy conditions.
Try a Different View
My only regret after leaving Page was that I didn’t hike all the way round to the centre of Horseshoe Bend to see the different angles available. It would have been interesting to see the opposite view to the images above looking back towards the photographers. Take your time if you can and hike to the other side or further along each rim.
Getting There
From Page
From the main Loop Road in Page, head West and take the 89 South for about 10 minutes until you see the sign for Horseshoe Bend on your right. The car park is close to the highway and entry is free. From there you hike up a mild hill and then down towards the overlook. Total hike time is 10 minutes max if you are fit. The terrain is sandy and easy to negotiate.
We were there in May and there was quite a crowd but the overlook is so huge you’ll find plenty of space. In the summer it can get scorching hot so take plenty of water
Accommodation
Page has lots of choice when it comes to accommodation. As usual we stayed at one of the cheaper places so the Travelodge fit the bill. It’s close to everything and the essential wifi was usable.
Dining
There are plenty of dining choices in Page, Arizona. We frequented the ‘Asian Cuisine – Indian and Thai’ which was decent and close to our hotel. Stromboli’s also did decent salads that were good value for money.
While You’re There
When in Page you MUST go to Antelope Canyon, read my Antelope Canyon Photo Guides 1 and Photographers Guide to Antelope Canyon Part 2 for the full scoop on how to shoot those amazing places. There are also countless places on Lake Powell that will yield amazing photos but you’ll need to hire your own boat to get anywhere during good light.
Also check out Lower Antelope Canyon and if you’re up for a drive, take a trip to Monument Valley.
If you liked this Horseshoe Bend Photo Guide please leave a comment and share this article with your friends.
Gavin, I love the pano of Horseshoe Bend posted here. Absolutely stunning and gorgeous! Hoping to visit for the first time next April and appreciate your photo tips on Antelope Canyon too. Question: If the Horseshoe Bend pano used six shots in portrait position, was each one an HDR? So maybe five exposures per shot for each of the six shots? Thus 30 exposures altogether? I might try this. Just wanted to know if you have any other comments before I attempt it.
That’s right Jean although I used just three exposures per photo. 5 would be a bit much for mid afternoon dynamic range with no sun in the shot.
You should be able to do it particularly if your camera has a continuous shooting setting of 5 fps or better. I’d try bracketing at 5 frames at +2_+1_0_-1_-2 and check the histogram. Then maybe 3 frames or 7 if needed. I’d pre-plot my center spot for each of the 6 vertical frames and practice hitting them a few times. I expect to try this method on June 6th this year. Note that normal water flow is low in the early morning or late afternoon when electricity demand is down. Hoping for some clouds but we’ll see!
Great advice! Thank you! We’re heading there to photograph an anniversary session the middle of May! Any tips on how to photograph a session while there?
Just prepare for crowds and ever changing light. It can get windy too at times.
Great shot. Why did you use the portrait setting? I am heading up next week and other advice?
To get maximum resolution.
Thanks a lot for the tips for Antelope Canyon and Horseshoe Bend. Do you think that would I be able to do good shots in both places with a canon f4 16-35 ultra wide angle lens or should I go wider with a 10-22 lens? I have a Canon T5 câmera with crop sensor. Thanks a lot.
Hi Fabiano. The 16-35 is perfect for the job for a full frame but with a crop sensor the 10-22 might be better.
We were told at the hotel that they now charge $10 to park there. So be prepared to pay now. Seems nothing stays free. Thanks for the tips!
I was there 21 March 25, they charge $10. The gate is open sunrise to sunset (basically 6am to 6-630pm). Don’t even think about entering through the exit gates after they close (reverse spikes) or parking on hwy 89 (traffic poles 1/4 mi ea direction)
Hi Gavin thanks for your very useful information and great shots. This time I am only using an iphone 14 so it will be interesting to see what photos I get.
Great to follow you.