
How to Get Super Sharp Landscape Photos Tutorial
Over the years I’ve found myself teaching the same 8 basic tips for getting super sharp landscape photos. I reckon I’ve managed to condense it down into some really easy to follow tips. So much so in fact that I put together a 4K video showing you exactly how I do it. The tutorial takes just 90 seconds.
For those who would rather not download the video on their phones and use expensive data I’ve also listed each of these points right here on this page so that you can recall these tips easily when you’re out in the field. Ready? Here we go!
1 – Use a Sturdy Tripod with a Ball Head – Make Sure Everything is TIGHT
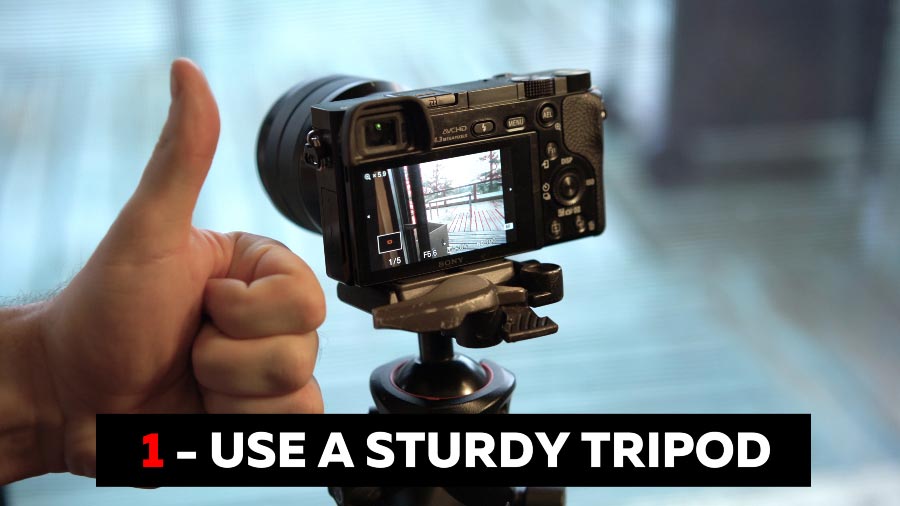
Flimsy tripods are a waste of money. Buy a good one and avoid misery. However much money you think you’re saving by buying cheap – you’re actually kidding yourself. Your $6k camera deserves to be held aloft by a worthy tripod. Spend at latest $300 and you might stand a chance of not being driven insane by sub par gear.
2 – Focus Manually With Live View.
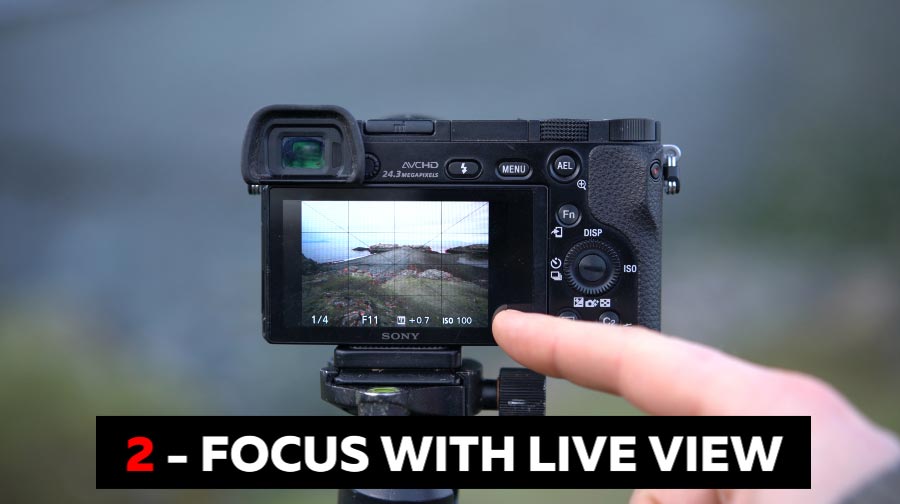
First of all, switch of autofocus on the lens and body. Then use your cameras ‘Live View’ or EVF to punch in with the magnifier and then turn the focus ring on your lens until you achieve perfect focus.
3 – Use the 2″ Timer.
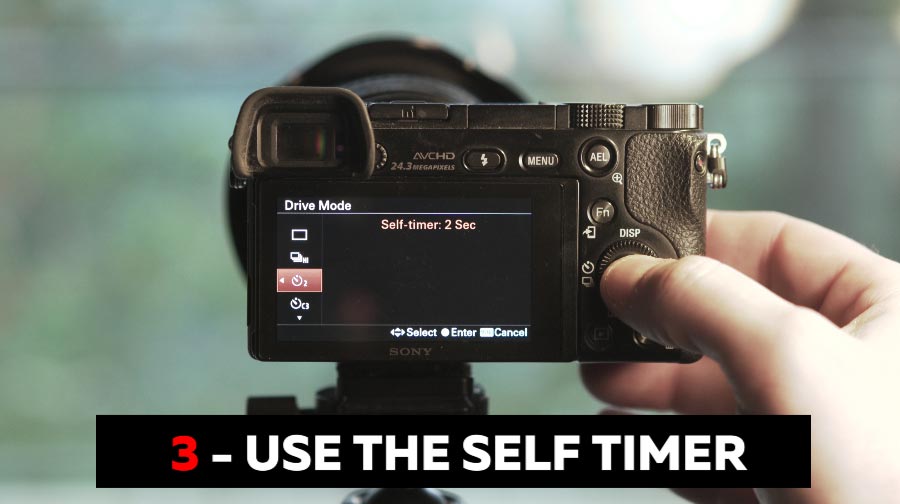
Use the 2″ timer (or 10″ if you want to be really sure) or a Remote Shutter to eliminate vibration when taking the shot.
4 – Use Mirror Lock up if you’ve got a DSLR
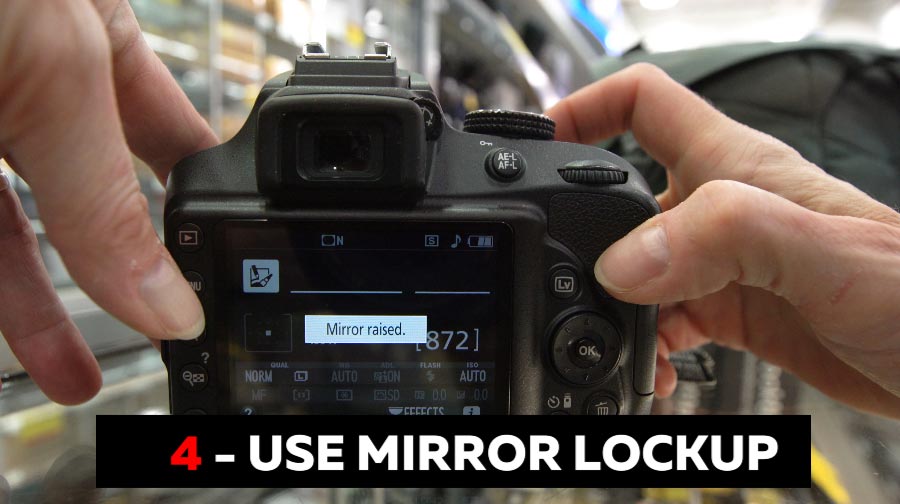
That noisy mirror mechanism causes lots of vibration. Avoid that be enabling ‘Mirror Lockup’. Some newer DSLR cameras already have this figured out and automatically lock the mirror up when you use the 2″ timer. If you’re still viewing in ‘Live View’ when you take the shot your mirror will already be up.
5 – Use Your Lowest ISO setting.
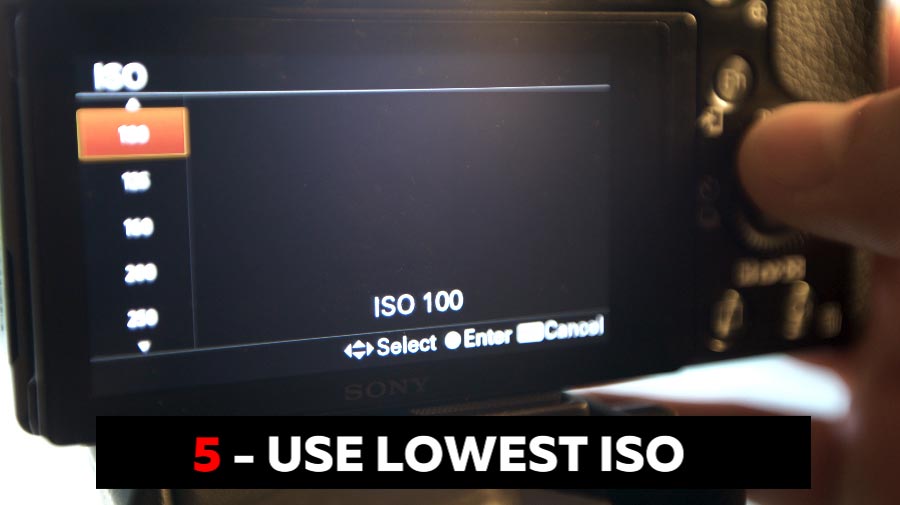
When shooting landscapes you can improve your image quality by choosing your lowest ISO setting.
9 – Use a Sweet Spot Aperture
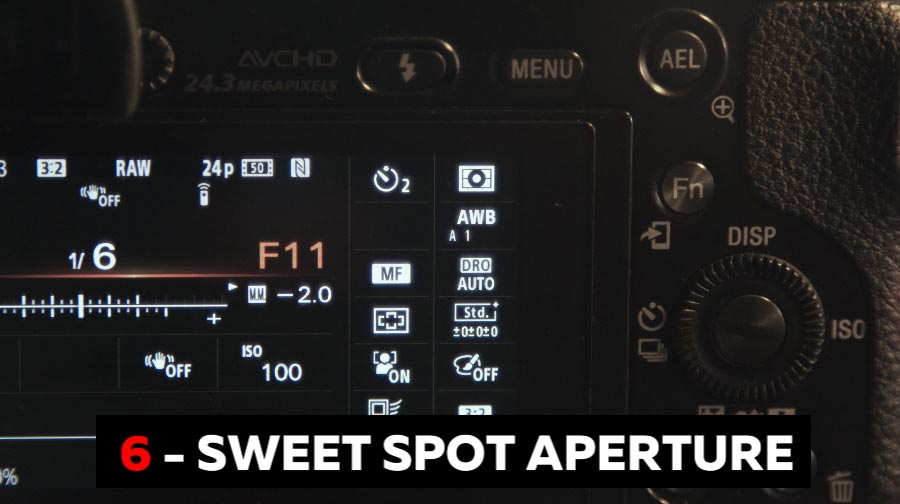
For maximum sharpness, choose an aperture somewhere in the centre of your aperture range. Start at f/11 and then experiment with other apertures close to that. All lenses are different and some perform better than others. I’ve found that f/8 is a great performer with my Ziess Batis 18mm and you also have to take into account ‘Depth of Field’ as you’ll have shallower depth of field the wider your aperture gets.
7 – Focus In the Distance
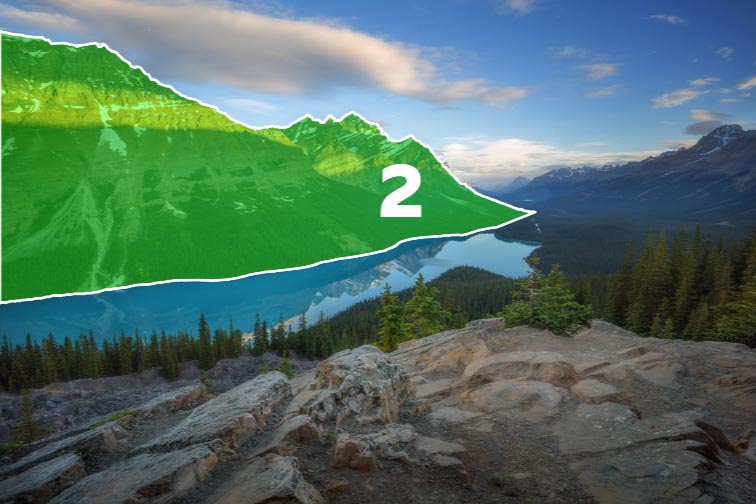
Don’t pick a focus point that’s too close to your camera. Pick a nice contrasting edge just beyond the middle distance. Imagine your image as a series of layers and pick the second layer from the furthest thing you can see. Focus on that.
8 – Switch Off Image Stabilization
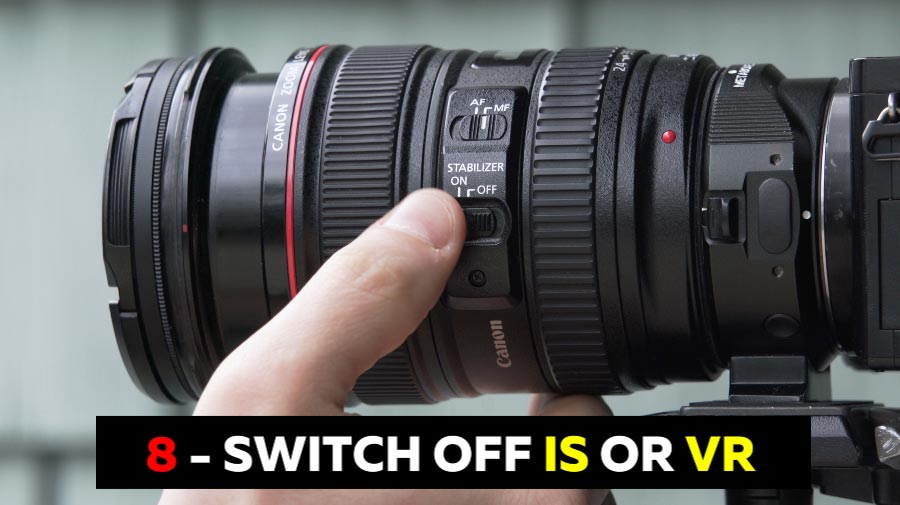
When using wide angle lenses on a tripod you just don’t need it. When using telephoto lenses you might need this switching ON at times, especially when you’re at the longest possible focal length. Wide lenses don’t supper as much so switch it off unless you’re shooting hand held.
Got Any More Tips?
These 8 tips should keep your images crisp and sharp but if you’d like to add more tips please post a comment and let me know how you achieve razor sharp images.
Thanks for these tips. Very helpful to have a list to work off of. Your landscape images are fantastic, so you are a trusted resource. Do you ever use hyperfocal distance to get everything acceptably sharp?
My website link is below. It needs A LOT of work, but thought I’d share it anyway.
Thanks!
Hey Gavin,
Awesome pics and I am going to Devils Pulpit this week when we get some rain here in Scotland.
Just a thought about your points above.
Shut the view finder with cover if DSLR.
Use PhotoPills for Depth of Field calcs if very close foreground interest.
Cheers,
Chris
Hi Gavin,
luv the videos and also those you and Old Grumpy take trips. Despite the fun I learn quite a lot about what you do and both of you truely inspire me to give more and get more out of my shots. Since my stroke last year – just after a fototrip in my area – I no longer manage to hike much or get to the more difficult locations but before I went to Scotland, also to Vancouver Island and the Rockies, so I do know a bit about the countryside you feature. Keep it up and also keep the fun, just makes my day.
Adam
I have Uncle grumpy’s problem of not being able to focus without glasses
I’ll take on your tips until I find an uncle grumpy who may know more. lol.
Where’s my tripod
Great tips for sharp images, Gavin! for live view focusing, I use a combo of autofocus and fine-adjust focus manually (so lazy and easy to do on the Fuji system, as the autofocus has been accurate enough 90%of the time. having focus peaking on helps loads too)
I can’t tell you how many times I’ve left image stabilization on, still struggle with it! Thanks for another reminder on this! Now I know that, “if Gavin says it, it IS THE LAW”.
hahaha, we’ve all done it 😉
Thank you for the guide it’s Tresmendus
Gavin,
I just watched the TV series strongman and I thought I recognized one of them, both looks and accent and mannerism. I kept racking my pea brain and came up with nothing! I watch three shows one after another and the light finally lit up.
It was you! Yep you! A strongman!
I’m not sure how I would define “strength”, but I’m sure you or Grumpy can think of something!
Yea, check it out!
HAHAHAHAHAHA
https://www.facebook.com/Blindmans-attempt-970587723098571
Look you and your crew are amazing shooters. I learn so mich from each video you make. Thank you for the experience.
Just love the comedy in your videos it makes learning Photography much more fun and hoping you will get best photographer of the year award this year I think you have earned it
I subscribe to your videos and love them. Sadly however you need a sense of humor. All kidding aside, I was always tought to focus 1/3 up from the bottom of the frame for DOF. You say above center. Which is best?
It totally depends on what you’re shooting and how far you are from the furthest subject. Here’s a really great video that gives you a basic starting point https://www.youtube.com/watch?v=KB7FR8u830Y
My short focus vision has deteriorated, I’m 58, so i use 2x magnification glasses to help with live focus and reading other screen functions. If the subject isn’t moving i also use the camera screen magnification control to ensure good focus.
If subject is moving then have to trust the camera’s auto focus.
Love your videos. I look forward to joining one of your workshops. You suggest focusing just beyond center. I have always read focus one third into the picture. Your thoughts would be appreciated.
In all honesty there are a bunch of ways to do this. If you have to focus stack none of them become relevant because you’re picking several focus points. In the end the most important thing is checking the playback to ensure that you got the focus right. If you’re not sure, try it then check it a 100%.
Confused. Some professionals say focus 1/3 into the frame. Others say focus at the background. Others use future stacking. Others say focus on the subject and use focus peaking to tell when other areas area in focus. Everyone seems to have a different answer to focusing and they all can’t be right. Your thoughts?
Actually they can all be right and it depends entirely on your creative vision.
How important is an electronic front curtain shutter/electronic shutter for sharpness?
I tested this in the R3 and it did improve sharpness to switch on the silent shutter for fast exposures. Not sure it makes any difference in long exposures.
Thanks, I always wish my camera had a setting to lock the mirror up and then self timer take the photo a couple of seconds later. Unfortunately I don’t think it does, maybe with a remote/ shutter release cable but that seems a bit more of a faff!
Total faff!